Best Tools and Tips to Digitize Logo for Embroidery Accurately
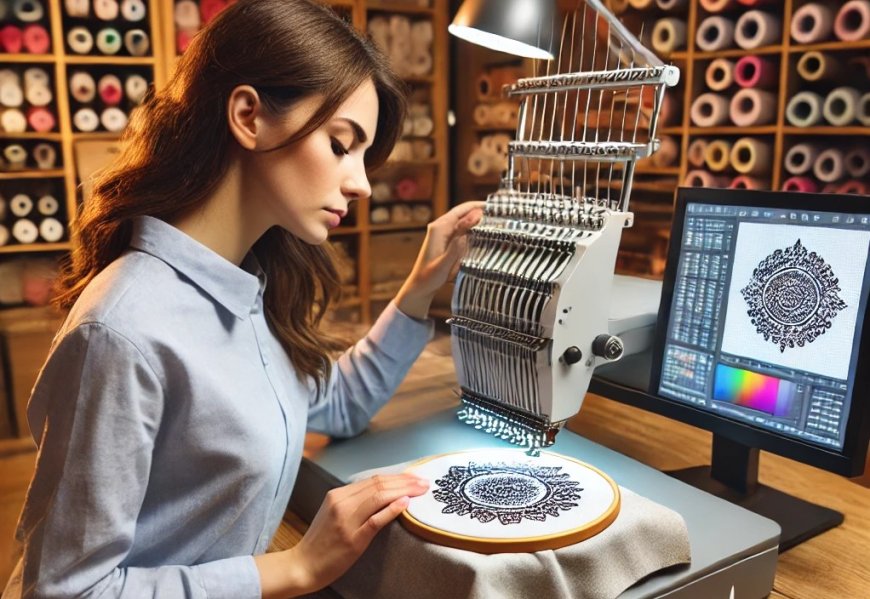
Turning your company logo into a flawless embroidered design requires more than just converting a file format. It's an art that combines technical precision with creative problem-solving. Whether you're digitizing your first logo or looking to improve your technique, these professional tools and insider tips to digitize logo for embroidery will help you achieve crisp, professional results every time.
Essential Software for Logo Digitizing
1. Wilcom Hatch
The industry standard for professional digitizers offers unparalleled control:
- Advanced stitch editing at the individual stitch level
- Realistic 3D stitch simulation
- Automatic punch optimization
- Price: $1,000+ (professional version)
Best for:Serious embroiderers and businesses needing commercial-grade results
2. Embrilliance Essentials
A more affordable option with impressive capabilities:
- User-friendly interface
- Good auto-digitizing with manual override
- Includes lettering tools
- Price: $199
Best for:Small businesses and advanced hobbyists
3. SewArt
The most budget-friendly quality option:
- Simple auto-digitizing
- Basic manual editing
- Great for simple logos
- Price: $50
Best for:Beginners and occasional digitizers
Preparing Your Logo File
Before you even open your digitizing software, proper logo preparation saves hours of frustration:
- Start with vector files(AI, EPS) whenever possible - they convert cleaner than PNG/JPG
- Simplify complex elements:
- Remove gradients (convert to solid color blocks)
- Thicken lines under 1mm
- Increase spacing between small text characters
- Minimum 1/4" height for readable text
- 3-5 colors max for clean stitching
Step-by-Step Digitizing Process
1. Set Up Your File
- Input exact dimensions based on placement (left chest? full back?)
- Select appropriate fabric type - this affects all subsequent settings
- Choose your stitch types before placing any elements
2. Assign Stitch Types
Different logo elements need different approaches:
- Text: Satin stitches (3.5-4.5mm width)
- Large areas: Fill stitches (0.35-0.45mm density)
- Outlines: Running stitches or narrow satin borders
- Small details: Consider converting to running stitch if under 2mm
3. Add Stabilization
No logo stays crisp without proper underlay:
- Edge run: Outlines all elements first
- Center walk: Reinforces large filled areas
- Zigzag: Great for stretchy fabrics
4. Optimize Stitch Flow
Professional digitizers spend most time on this critical step:
- Stitch from center outward to prevent fabric pull
- Group colors to minimize thread changes
- Adjust stitch angles to complement the design (30 or 45 usually best)
- Add pull compensation (10-15% extra width)
Pro Tips for Perfect Logo Embroidery
1. The Density Sweet Spot
- Fill stitches: 0.35-0.45mm apart
- Satin stitches: 3.5-4.5mm wide
- Underlay: 1.5-2mm spacing
Too dense = stiff, cracked designs. Too sparse = gaps in coverage.
2. Small Text Solutions
- Use satin stitch instead of fill for text under 1/4"
- Increase letter spacing slightly
- Bold fonts stitch cleaner than thin ones
3. Color Transition Tricks
- Add a running stitch border between color blocks
- Stitch dark colors first when possible
- Use color blocking instead of gradients
4. Testing Protocol
Never stitch your final product first:
- Stitch on scrap fabric of the same material
- Check for:
- Puckering/distortion
- Thread breaks
- Color accuracy
Common Logo Digitizing Mistakes
Auto-Digitizing and Walking Away
- Review auto-generated stitch paths
- Adjust underlay and density
- Clean up unnecessary trims
Ignoring Fabric Differences
A logo digitized for:
- Polo shirtsneeds different settings than
- Denim jacketsor
- Performance fabrics
Create separate files for different materials.
Overlooking Hoop Size
Your design should be:
- At least 1" smaller than your hoop on all sides
- Scaled appropriately for placement (left chest vs. back)
When to Hire a Professional
Consider outsourcing logo digitizing if:
- Branding consistency is critical
- Your logo has complex gradients or tiny details
- You're working with difficult fabrics
- Time is more valuable than money
Professional digitizing typically costs $20-$75 per logo but saves hours of trial and error.
The Future of Logo Digitizing
Emerging technologies to watch:
- AI-assisted error detection
- Auto-adaptation for different fabrics
- Cloud-based collaborative digitizing
- AR previews showing exact stitch results
Yet human expertise remains essential for brand-perfect logos.
Final Checklist
Before finalizing your digitized logo:
? Test-stitched on actual fabric
? Verified no thread breaks
? Checked all elements are crisp
? Confirmed color sequence
? Saved original artwork and embroidery file
Key Takeaways
Digitizing logos for embroidery is both science and art. By:
- Using the right tools
- Following a meticulous process
- Testing thoroughly
- Learning from each project
...you'll transform flat logos into stunning embroidered designs that represent your brand at its best.
Now that you're armed with these professional techniques, that logo file on your computer is ready to become a tangible, thread-perfect reality. Happy digitizing!